Choosing a T beam welding line is not just a matter of comparing prices or advertised speed. The right system must match your beam dimensions, plate thicknesses, production volume, and required weld quality. A line built for long, repetitive runs may not suit a shop handling frequent custom orders. Fit matters.
Start by measuring the beams you actually produce, including their length, flange width, and web thickness. Then examine how the line handles positioning, tack welding, and continuous welding. Ask how quickly operators can change settings between jobs. Check the space required for loading and unloading, too. A machine may fit the floor plan on paper but leave little room for safe material handling. Small details count.
A T beam welding line should also be judged by its controls, inspection process, maintenance needs, and access to technical support. Request a production trial using representative workpieces, not an ideal sample selected for a demonstration. Watch the joint alignment and finished weld closely. Ask what happens when parts vary slightly. Real parts are rarely perfect.
A hypothetical welding-automation specialist, Elena Brooks, captures the decision this way: “A good line fits the beam, the weld, and the workday—not just the brochure.” Treat that as a practical principle, not a substitute for independent testing. This guide explores the key selection criteria, common trade-offs, and questions worth asking suppliers. Some choices will remain uncertain until you test them in your own shop. That is worth admitting.
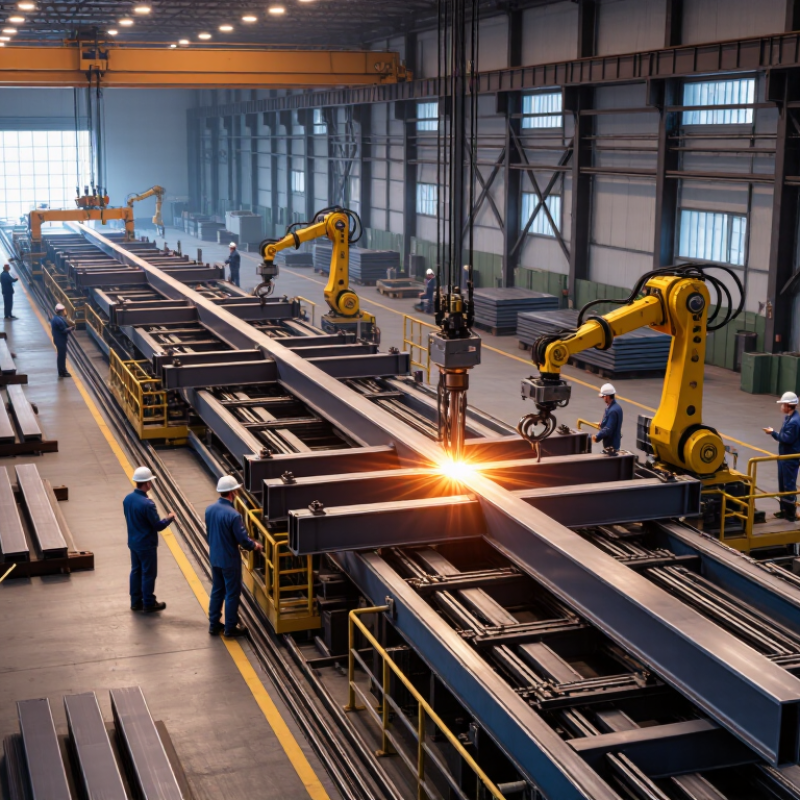
A T-beam welding line brings several tasks into one coordinated process. Its core components typically include web and flange positioning units, clamps, welding heads, conveyors, and straightening equipment. The web stands between two flanges, forming the familiar T-shaped cross-section. Accurate alignment matters: even a small gap or tilt can affect the finished beam. The line holds the pieces in place, welds their joints, and moves the assembly through each stage. That matters. A steady sequence can reduce repeated manual handling and help produce more consistent welds.
The line’s purpose is not just speed. It must keep the web centered, maintain suitable contact between parts, and manage heat that may cause distortion. Some systems use automated feeding and welding; others require operators to set positions or inspect the work between stages. A useful choice depends on beam dimensions, expected production volume, available floor space, and how much adjustment different jobs require. More automation is not always better. A line that handles one size very well may be awkward when dimensions change. Check how adjustments are made, how accessible the welding area is, and whether straightening can address the distortion your process actually encounters.
Tips: Ask for a demonstration using a beam close to your typical size. Watch the fit-up before welding, not only the finished seam. Confirm what measurements and maintenance checks operators must perform. Specifications help, but real setup time can be easy to overlook.

Before comparing a T-beam welding line, define the beams it must produce. Record flange width and thickness, web height and thickness, beam length, and the steel grades you use. Include the largest and smallest sizes, not just the most common one. Small variations matter. A line sized for today’s standard beam may struggle when a wider flange or heavier web enters production.
Next, estimate actual output requirements. Set a target number of beams per shift and note how many shifts run each day. Allow time for loading, tack welding, setup changes, inspection, and routine stops. A theoretical welding speed is not the same as finished output. That gap is easy to overlook. If sizes change often, describe the expected changeover frequency and acceptable setup time.
Describe the required weld type, weld length, and quality criteria, along with any straightness or dimensional tolerances. Consider how beams will be handled before and after welding; a long, heavy section needs suitable support to limit distortion. Ask for capacity data using your real material and dimensions, rather than a generic sample. A tidy specification sheet can still miss awkward parts of the job, so review it with operators who load, align, and inspect beams every day.
A T-beam welding line should match the joint, steel thickness, and production mix. Submerged arc welding suits long, straight seams and high deposition rates, but needs consistent fit-up and careful heat control. For shorter runs or frequent changes, gas-shielded wire processes offer more flexibility. They also make it easier to reach varied joint positions. Check distortion on sample beams; even a fast process can create costly straightening work.
Layout shapes daily output. An inline system can move beams through tack welding, main welding, and cooling with fewer transfers. A flexible cell handles varied sizes, but cranes and operator access can become bottlenecks. Measure actual beam lengths, weld positions, and changeover time before choosing. Small detail. Keep room for rework, too. Real parts rarely fit every drawing perfectly.
Automation can range from mechanized positioners to seam tracking, robotic welding, and automatic inspection. The International Federation of Robotics reported 4,281,585 industrial robots operating worldwide in 2023 in World Robotics 2024. That figure signals broad industrial adoption, not guaranteed savings on a T-beam line. Compare cycle time, arc-on time, labor needs, and maintenance costs in a pilot run. I would not automate every station immediately; inconsistent tack quality can simply make defects arrive faster. Cite your own production data alongside vendor cycle-time estimates.
| Line Configuration | Welding Process | Typical Layout | Automation Level | Key Advantages | Main Considerations | Best Suited For |
|---|---|---|---|---|---|---|
| Manual or semiautomatic station | Gas metal arc welding (GMAW), commonly called MIG/MAG welding | One or more workstations; beams are positioned and turned manually or with basic handling equipment. | Low; the operator guides the torch and controls much of the welding sequence. | Flexible for varied beam dimensions, short runs, repairs, and frequent product changes. Requires less dedicated line equipment. | Output and weld consistency depend strongly on operator skill, fit-up, and access to both sides of the joint. Handling can add cycle time. | Job shops, prototypes, low-volume production, and operations with a wide mix of beam sizes. |
| Mechanized single-station line | Mechanized GMAW or single-wire submerged arc welding (SAW), selected to suit material thickness and production requirements | A beam is clamped in a fixed station; mechanized torches or a traveling carriage weld the joints. | Medium; travel speed and torch movement are controlled mechanically, while loading, fit-up, or turning may remain manual. | More repeatable torch travel and weld placement than manual welding. Can be configured for a defined product range. | The station can become a production bottleneck. Joint preparation, tack welds, and consistent flange-to-web alignment remain important. | Regular production of a limited range of straight T-beams where a compact, controlled welding setup is preferred. |
| Continuous or pass-through line | Often mechanized SAW for long, accessible fillet welds; GMAW may be used where flexibility or different welding positions are required. | Sequential stations for loading, alignment, tack welding, welding, and discharge; work moves along the line. | Medium to high; material transfer and welding travel can be automated, depending on line design. | Supports a repeatable production flow and reduces manual repositioning between operations. SAW can provide high deposition rates on suitable joints. | Requires coordinated station cycle times, reliable fit-up, floor space, and product planning. SAW needs flux handling and is less convenient where access or position is unsuitable. | Steady production of similar beams with predictable dimensions and a consistent work sequence. |
| Twin-station or parallel line | Mechanized GMAW or SAW, depending on joint access, thickness, and required deposition rate | Two work positions operate in parallel, or one station is loaded while welding proceeds at another. | Medium to high; often combines mechanized welding with powered positioning and material handling. | Can reduce waiting for loading and unloading and keep welding equipment productive when handling tasks take significant time. | Needs more space and coordination than a single station. The benefit depends on balanced station cycle times and sufficient work volume. | Medium- to high-volume production where handling or setup time limits the output of a single-station line. |
| Robotic welding cell | Typically GMAW; welding parameters and torch path are programmed for the specified joint and product range. | Robot with a fixture or positioner, safety enclosure, and defined loading area; a second positioner may allow concurrent loading and welding. | High for torch movement and programmed sequences; loading and inspection may be manual or automated. | Repeatable torch paths and parameter control can improve consistency on recurring parts. Programs can be changed for qualified product variants. | Needs accurate part location, suitable fixturing, guarding, and skilled programming and maintenance. Part variation or poor fit-up can require additional sensing or rework planning. | Repeat production of geometrically consistent beams where automation can be kept busy across planned shifts. |
Selection note: Actual productivity and weld quality depend on beam dimensions, plate thickness, joint design, welding position, fit-up, material, inspection requirements, and operator or system capability. Confirm the process and line layout with production trials and qualified welding procedures.
Equipment quality shows in repeatable results, not polished brochures. Ask suppliers to run sample beams close to your actual dimensions and steel thickness. Check weld appearance, alignment, and penetration, then inspect how quickly operators can adjust the torches and fixtures. Small alignment errors matter. A short demonstration may not reveal wear, so request maintenance records and details on critical components.
Safety deserves a close look during a real operating cycle. Observe whether guards, emergency stops, and interlocks are easy to reach and function as intended. Check fume extraction near the welding area, where smoke can gather around the operator’s breathing zone. Ask how routine cleaning and wire changes are performed. If these tasks require awkward reaches, workers may eventually skip steps. That concern is easy to underestimate.
Operating cost is more than the purchase price. Compare electricity use, shielding gas, wire, replacement parts, scheduled maintenance, and expected downtime. Ask how much training operators need, and whether common adjustments can be made without a technician. A faster line may still cost more if it creates rework or sits idle while parts are sourced. Build estimates from your own production hours, not ideal figures alone. Real shifts are messy. I would leave room in the budget for surprises, because even careful estimates miss something.
How to Choose the Best T Beam Welding Line?
Selecting a Supplier and Verifying Service Support
A supplier’s promises matter less than the support plan behind them. Ask who handles installation, operator training, and troubleshooting after commissioning. Request a sample service schedule, not just a sales presentation. That matters. Check whether technicians can review weld data remotely and how quickly they respond when production stops. A quoted response time should specify working hours and what happens outside them.
Ask for references from plants producing similar beam sizes and volumes. If possible, speak with operators, not only purchasing staff. Their experience can reveal practical details: whether torch alignment stays consistent, spare parts arrive promptly, and instructions are clear under pressure. Ask to see commissioning records, maintenance checklists, and a realistic list of recommended spare parts. Ask for proof. A supplier should also explain how its team diagnoses defects such as uneven welds or excessive distortion. General assurances are not enough.
Define service expectations before signing: response times, remote support, on-site visits, training refreshers, and parts availability. Confirm what is included and what costs extra. One detail is easy to miss: support may depend on your own staff recording alarms and maintenance accurately. Set a simple logbook process. It may feel tedious, and it will not prevent every delay, but it gives both teams useful evidence when performance slips.
Supplier Selection and Service Support: Suggested Evaluation Weights
Use these suggested weights to compare suppliers: prioritize welding quality and process capability, then verify commissioning, training, spare-parts availability, response commitments, warranty terms, and relevant references. The percentages are a planning framework, not market-survey results; adjust them to your production requirements.
Precision Cable Assemblies
16830 Pheasant Drive
Brookfield, WI 53005
Phone: 262-784-7887
Fax: 262-784-0681